Get an API Key
Our API key is a required and unique identifier you'll need to authenticate requests associated with your project. Use this simple guide to get your API key fast.
Prerequisites
- An account at ATS Anywhere
- requirement
- requirement
Step 1: Navigate to the API Access Page
From your ATS dashboard, access the main menu (in the upper right) and then select Account Details. Scroll down to the Integrate section and select API Access.

ATS Access Page for API Keys
Step 2: Generate a New API Key
The API Access screen will help you generate a new API key for your site, as shown below.
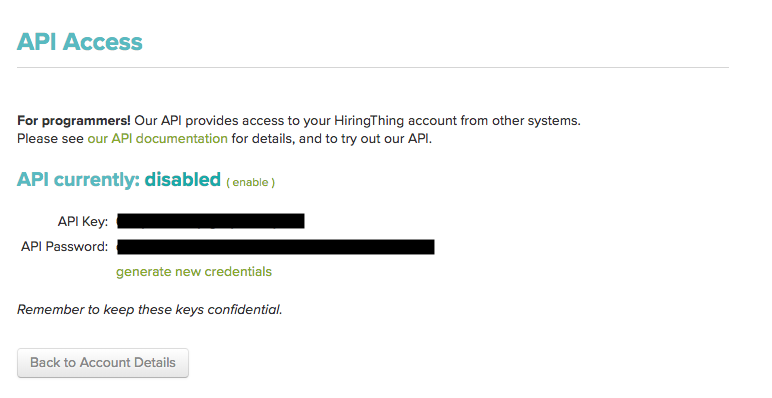
ATS Anywhere API Access Screen
Step 3: Create a collection in Postman to save your credentials.
Be sure to store your key and password in a safe place. In this example, we will save our credentials to new collection in Postman.
After opening Postman, click the button circled below in green to create a new collection.
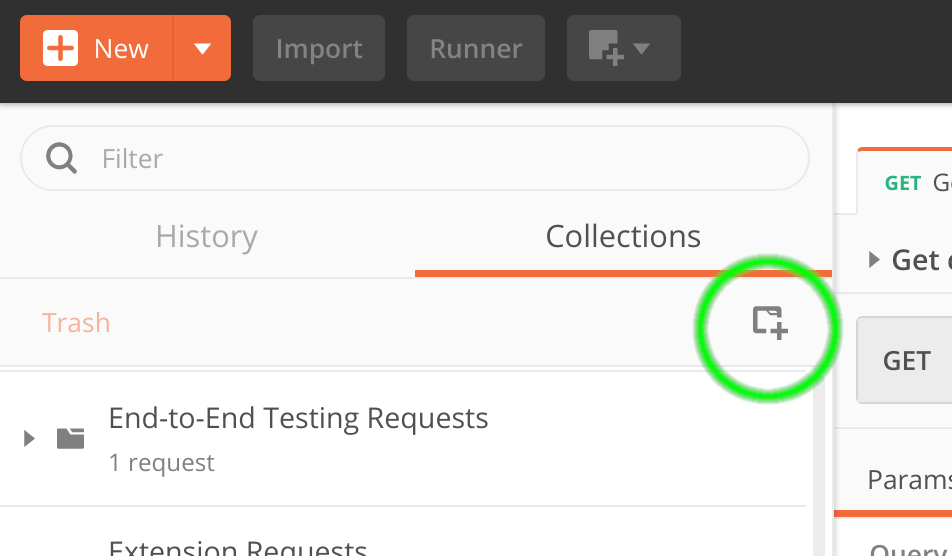
Click the New Collection button, circled here in green.
A new window should pop up asking you to name your collection. Use a name you feel is appropriate.
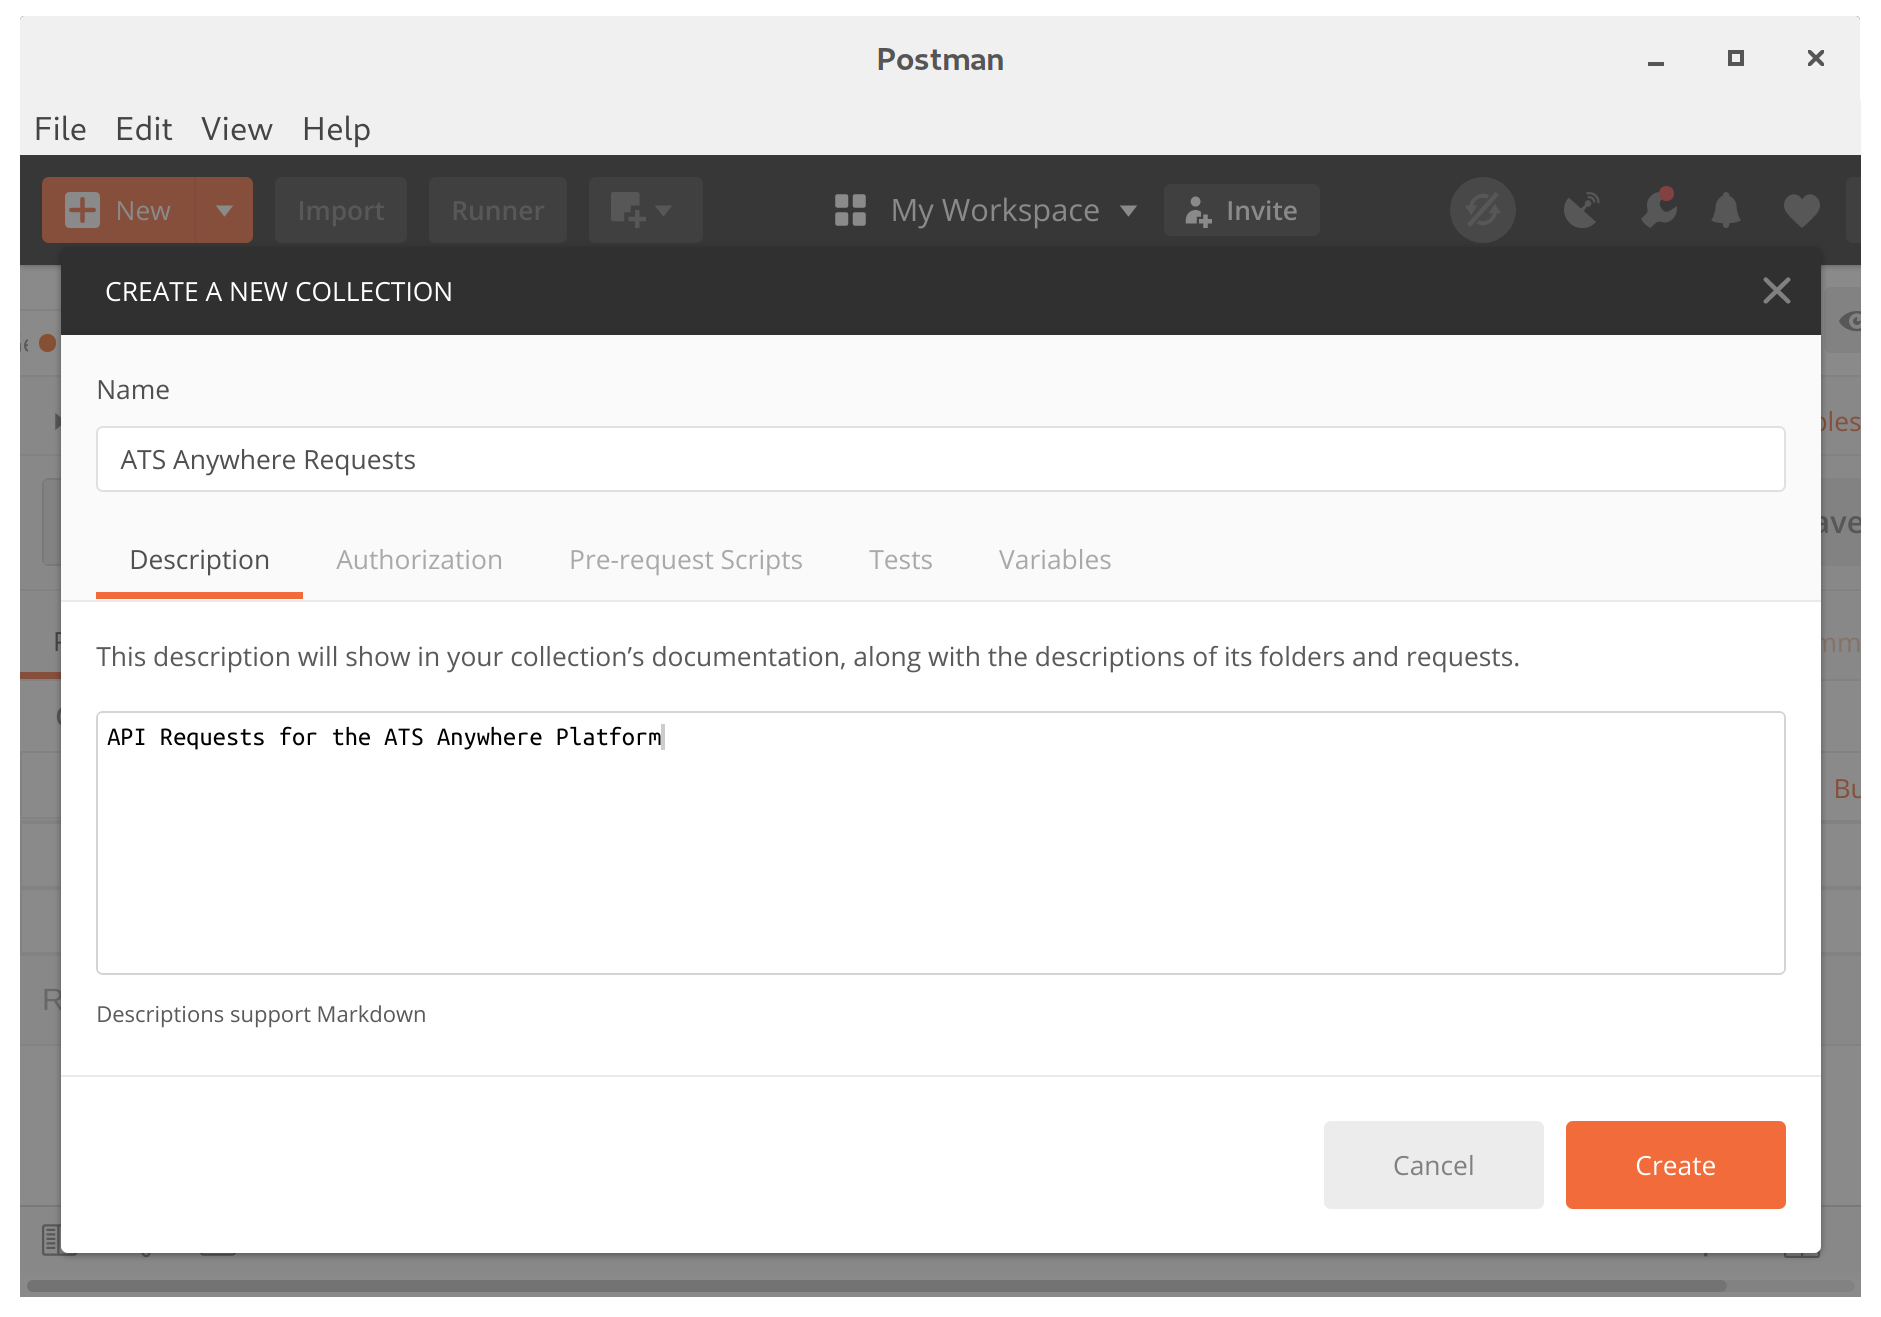
The 'New Collection' window.
Now navigate over to the Authorization tab. You should choose Basic Auth under the dropdown labeled Type. Add your API Key under Username, and your API Password under Password. Your Authorization Tab should look like so:
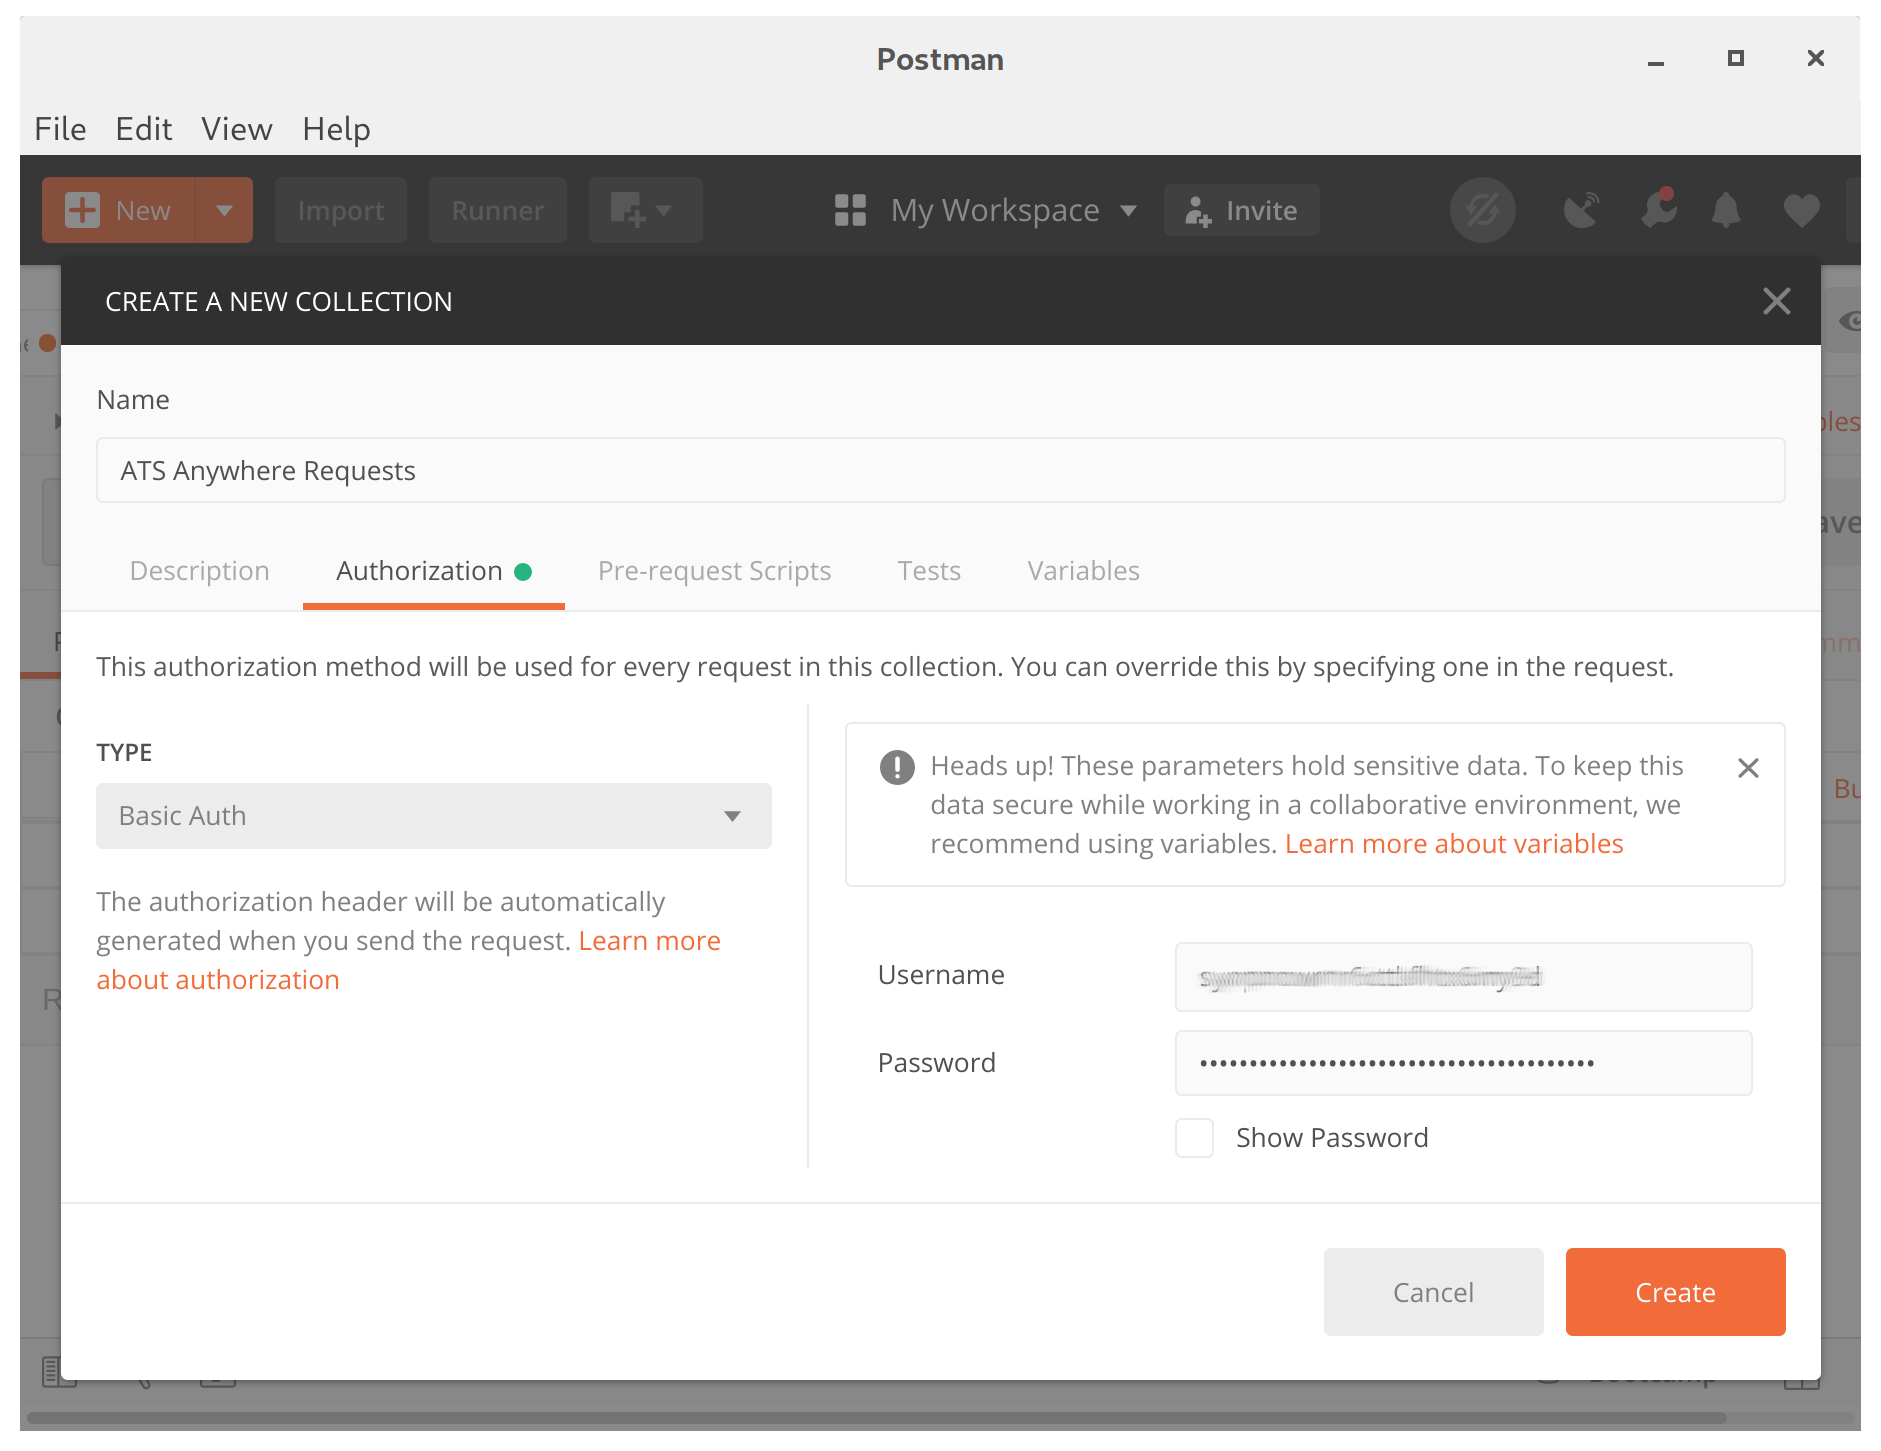
The Authorization tab after configuration.
Step 5: Verify your API Key is working with a simple request
Let's make a simple request that retrieves all jobs under your account.
Create a new request under your collection that contains your API credentials. Name it whatever you like, the example below simply calls it Get Jobs.
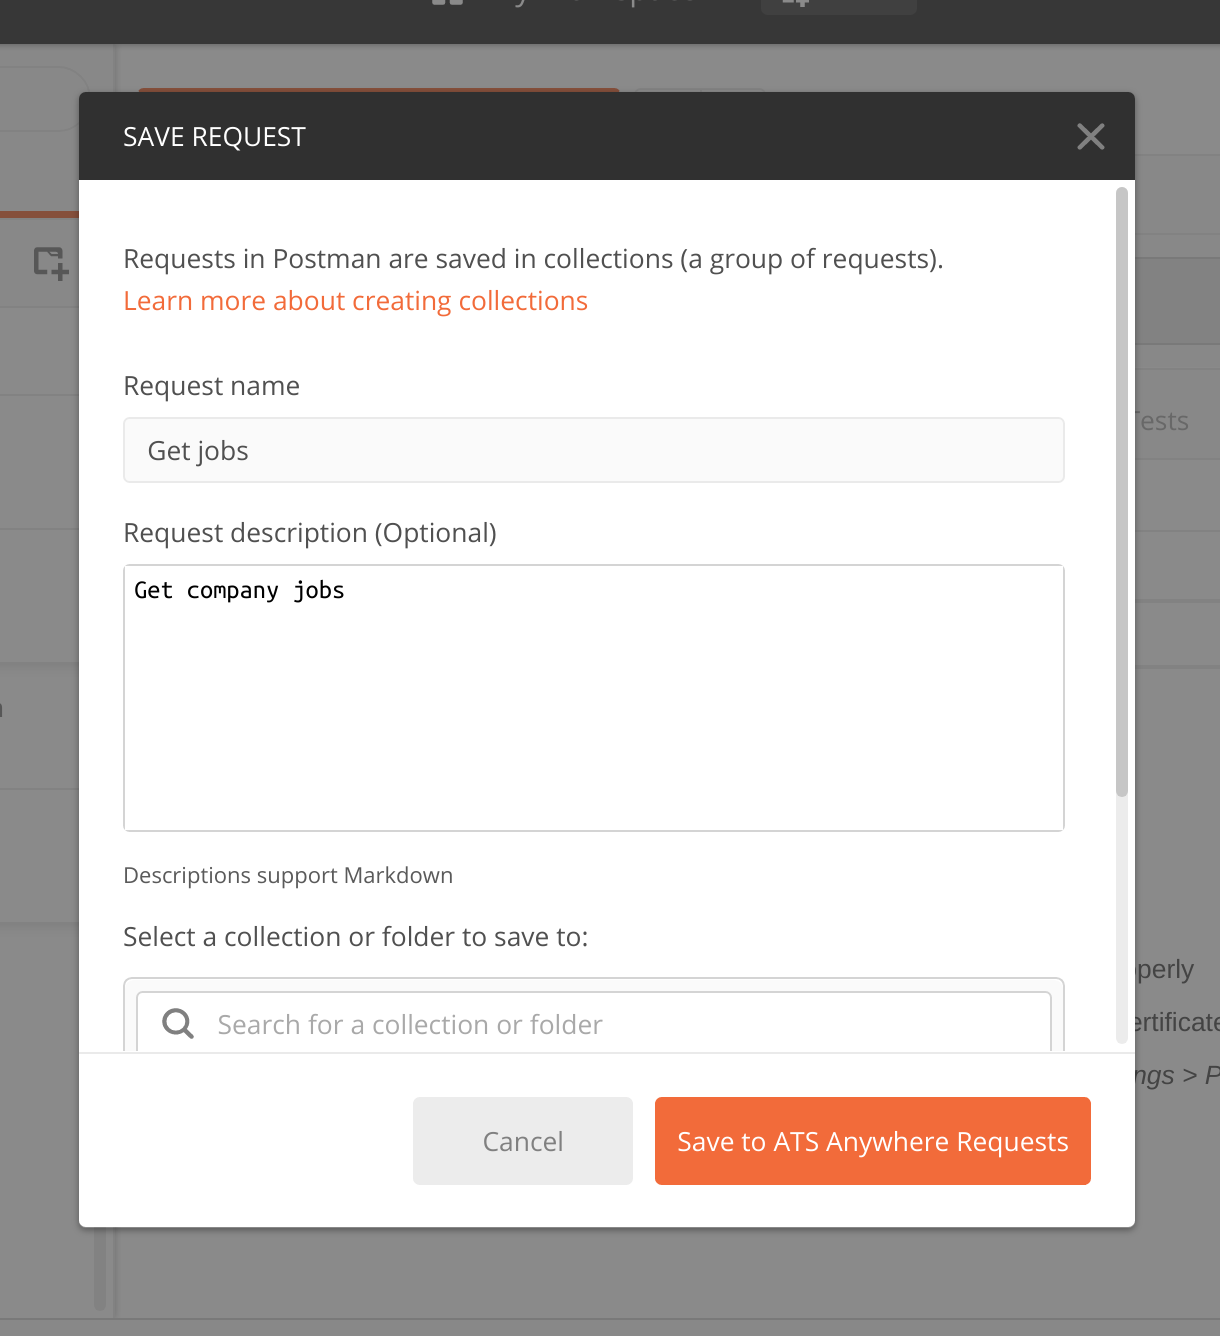
Create a request to get jobs.
Open up your browser and navigate to your dashboard or settings. Copy the base URL of your account. This is the web address without the path. In the this tutorial, we will use https://sampleco.applicant-tracking.com as an example.

An example of the web address under Account Settings for a sample company.
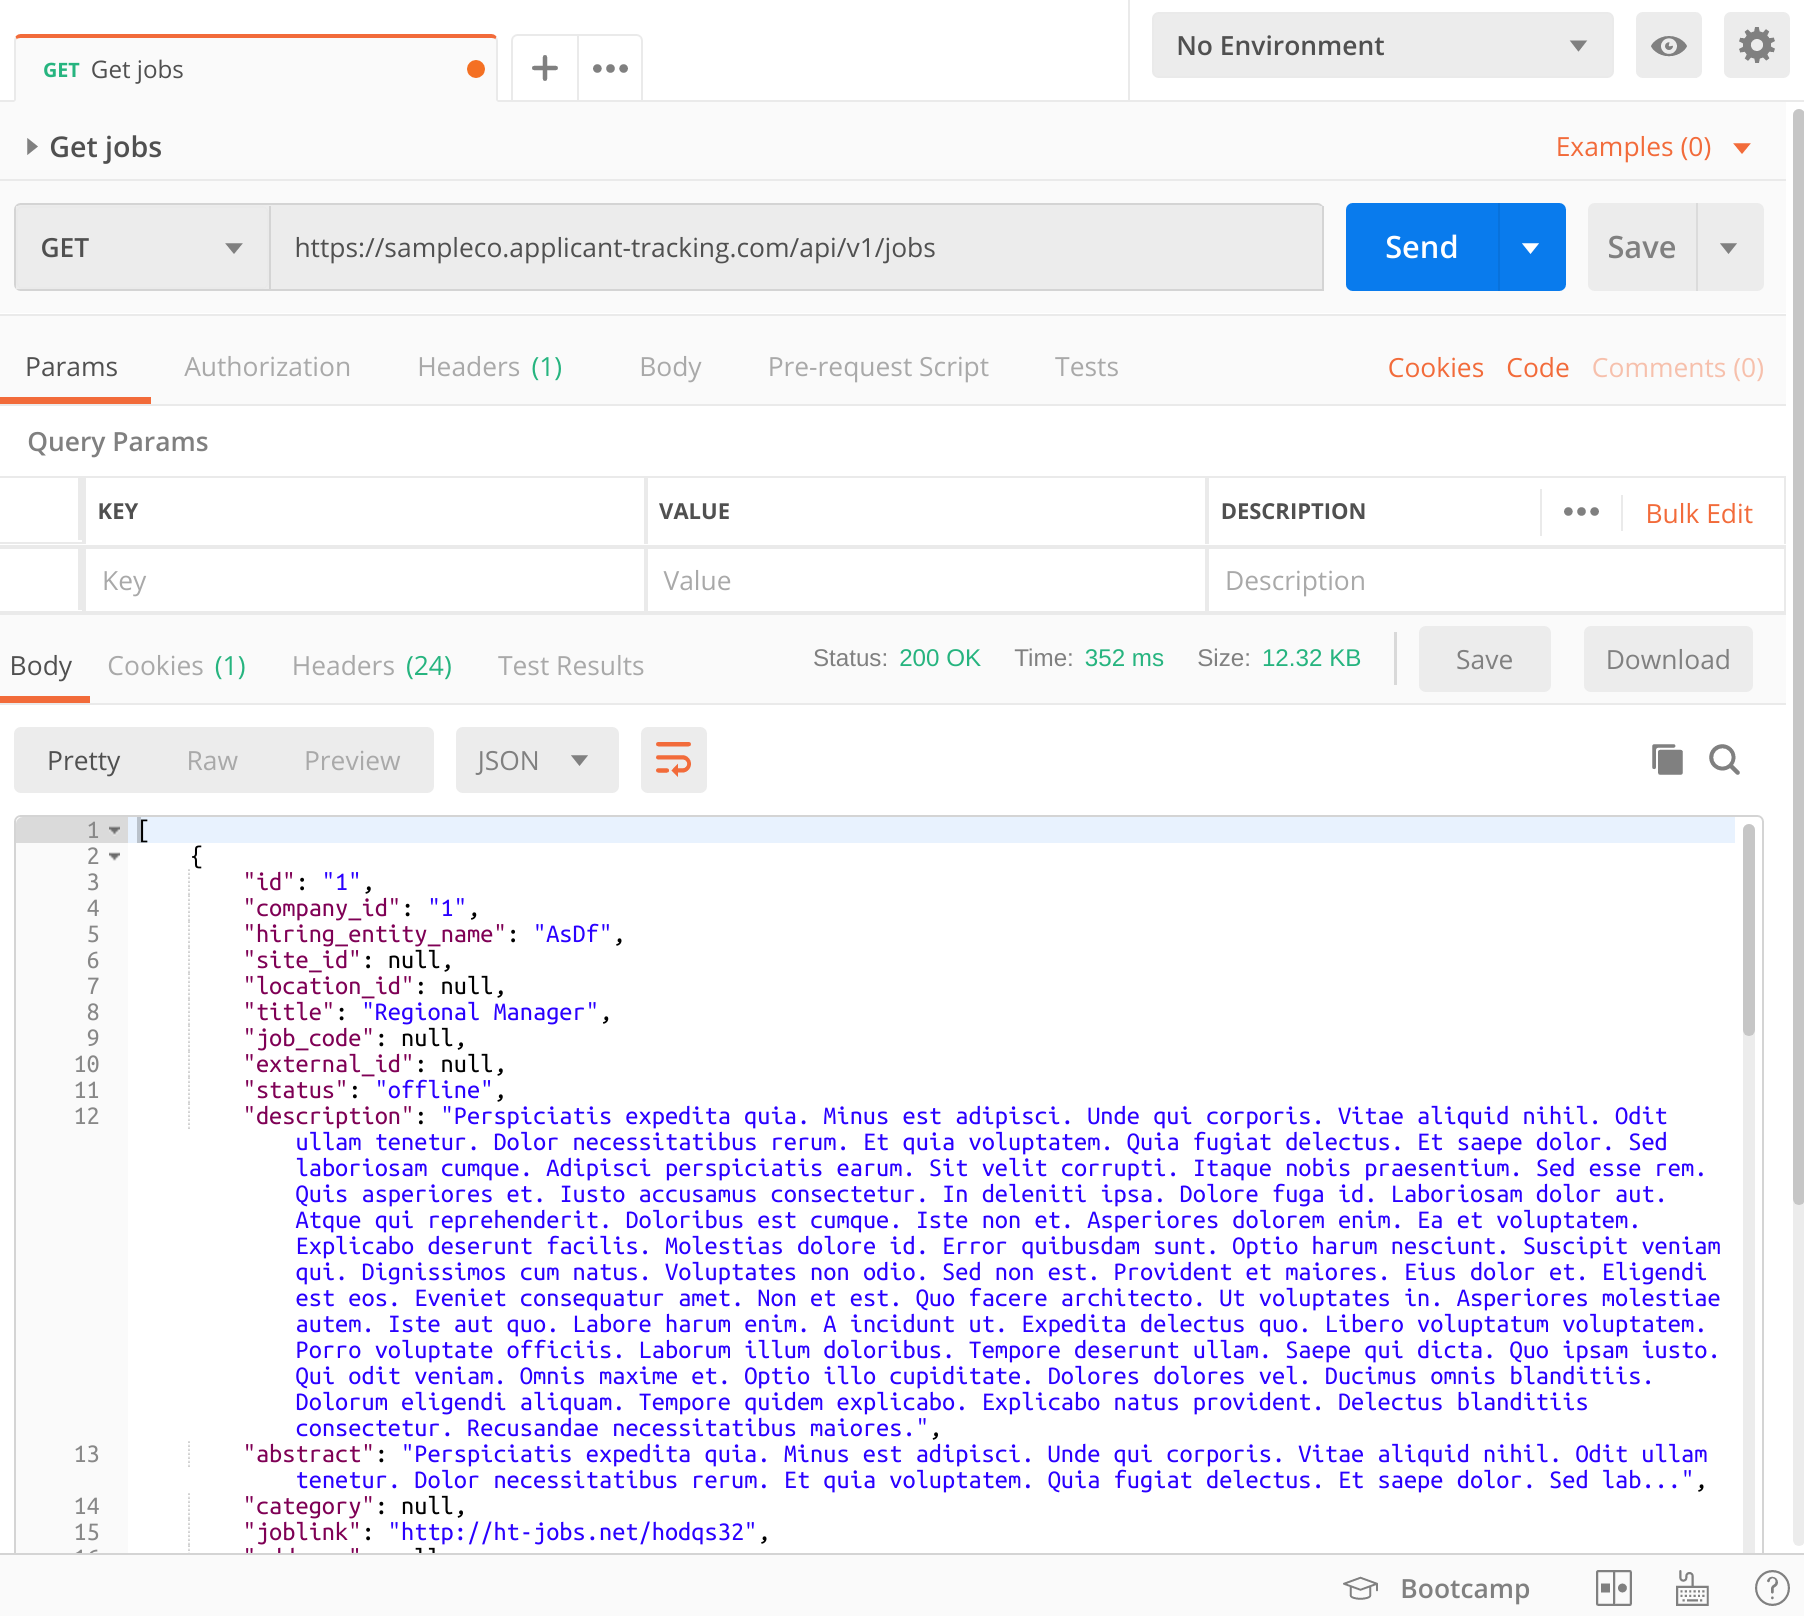
Paste the base URL into the request address. Add /api/v1/jobs to specify requesting the jobs via API.

Now you're all good to make a request! You should see a response returned in the form of JSON.
Support
Need Help?Reach out to ATS Anywhere Support if you need some help generating an API key for your team.
Updated 9 months ago
