Adding Custom Fields for Jobs
Use this simple guide to customize your jobs with our custom fields that are specific to your business or industry. You can create and update custom field schemas for the jobs on your site with our API.
Prerequisites
To create and update custom field schemas, you'll need to meet the following prerequisites:
- ATS Anywhere account
- API Access enabled with a valid API key
Step 1: Understanding where these custom fields will be located
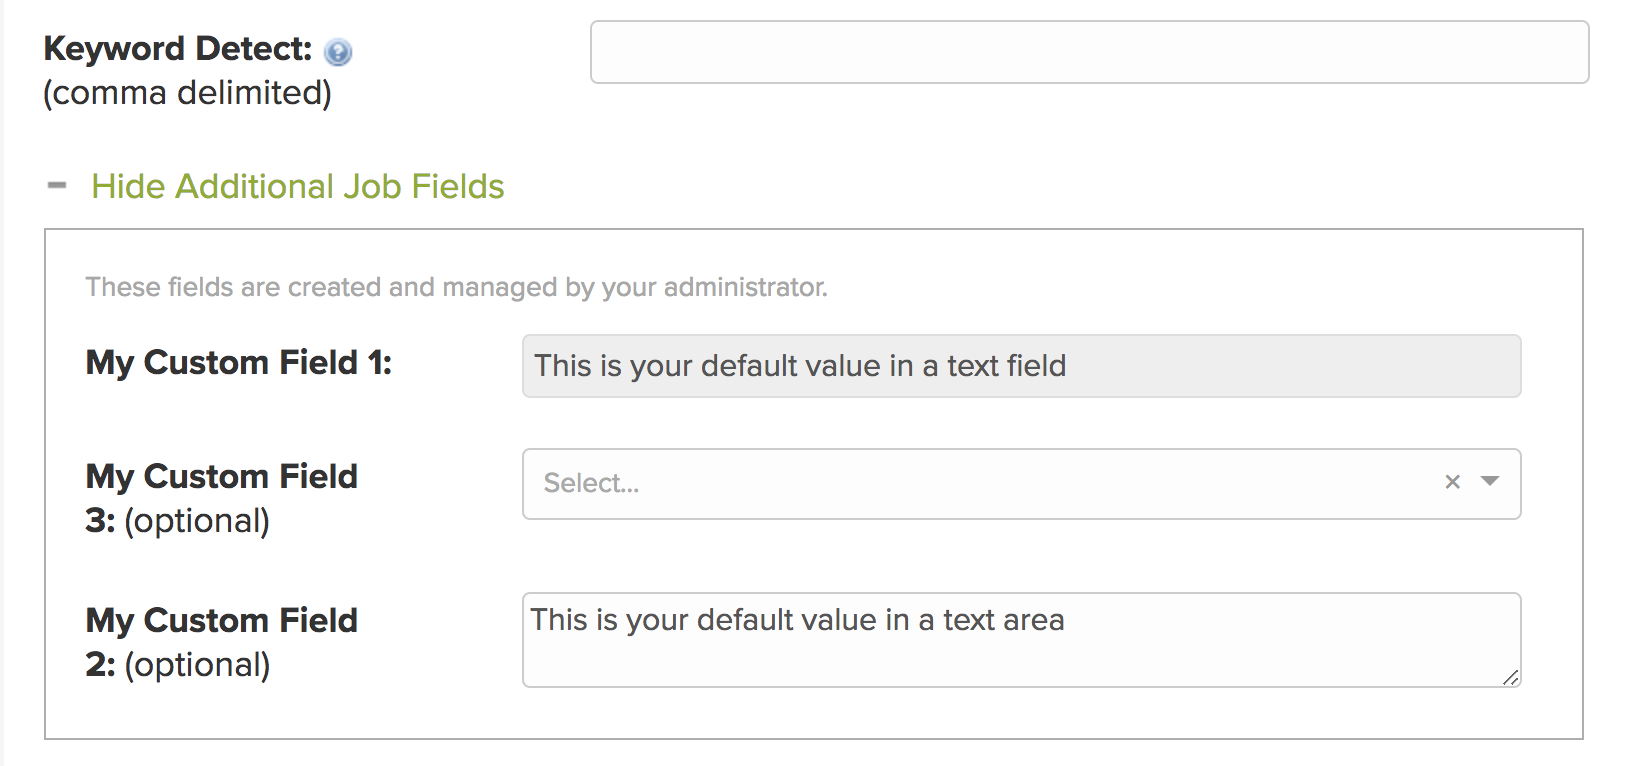
To give an idea of where these fields will eventually be located in the app, you can either start the process of adding a new job, or edit an existing job. Under the "keyword detect" field, there will eventually be a block with additional fields for the job you are listing. This will be empty/missing until you create your first custom fields, but this is where you will eventually find the data structures that you create here.

When we are done with this walk through, you will see the custom fields appear in this area, much like the image below.
Step 2: Validate that you can access the correct fields in the API
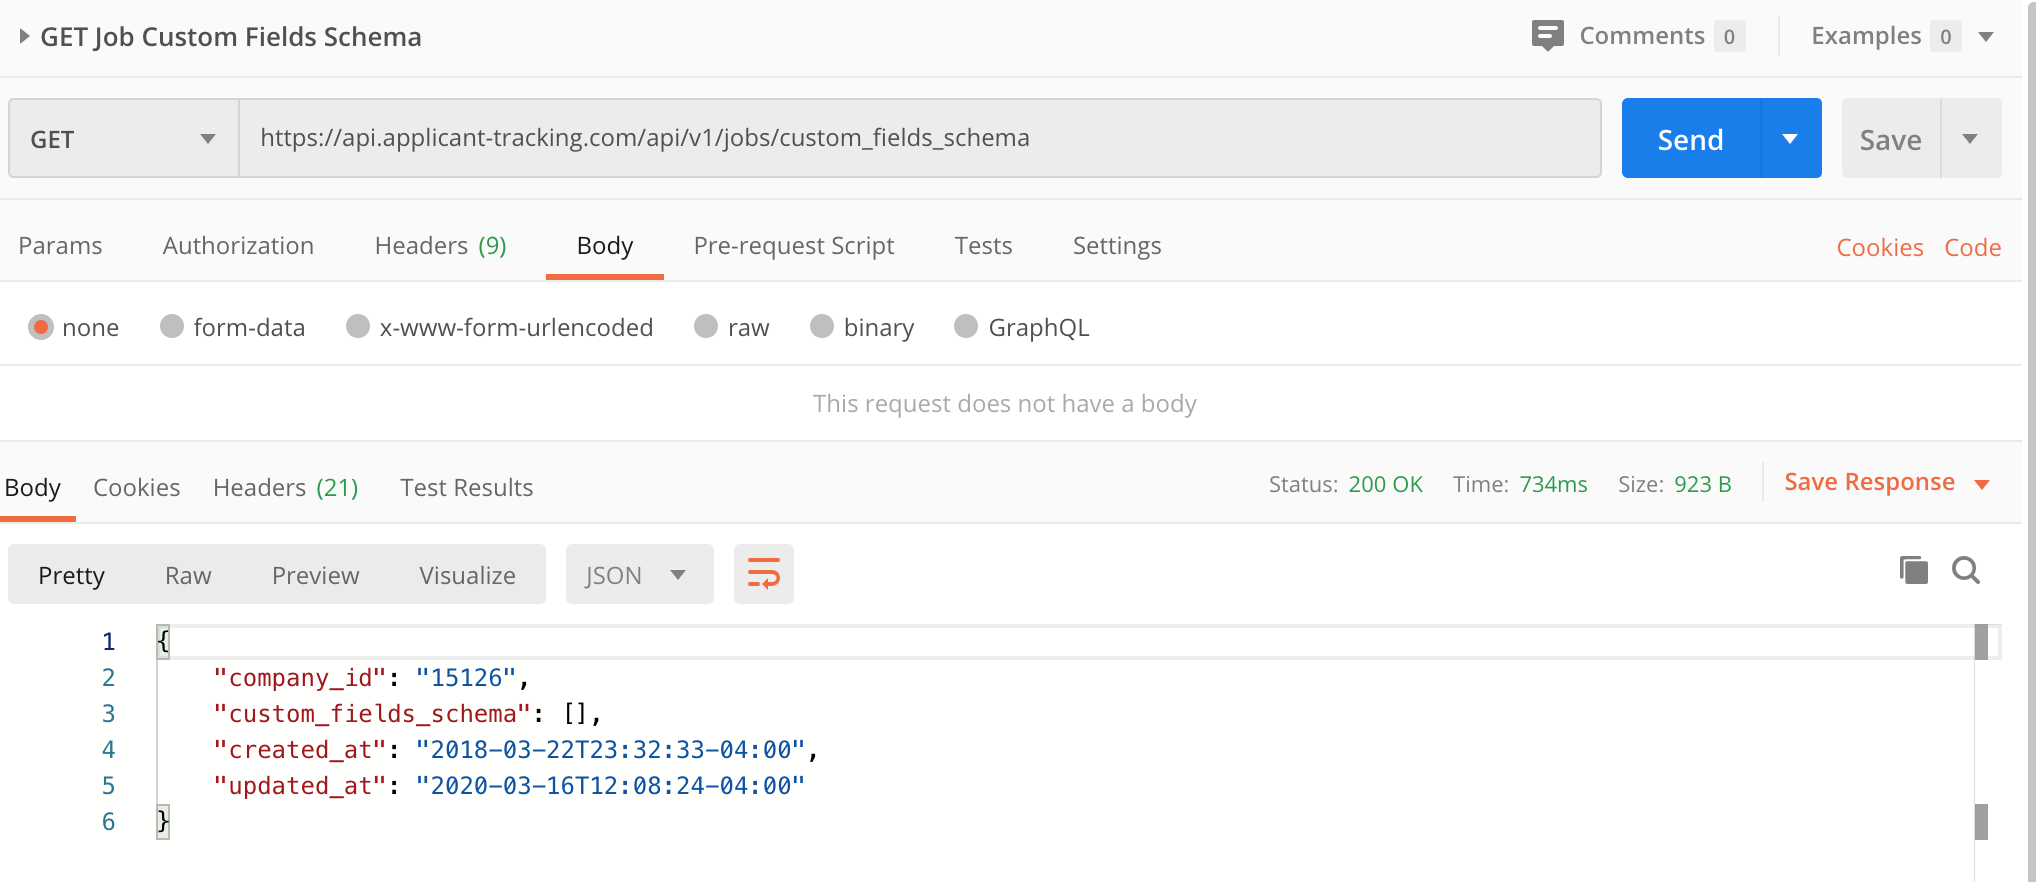
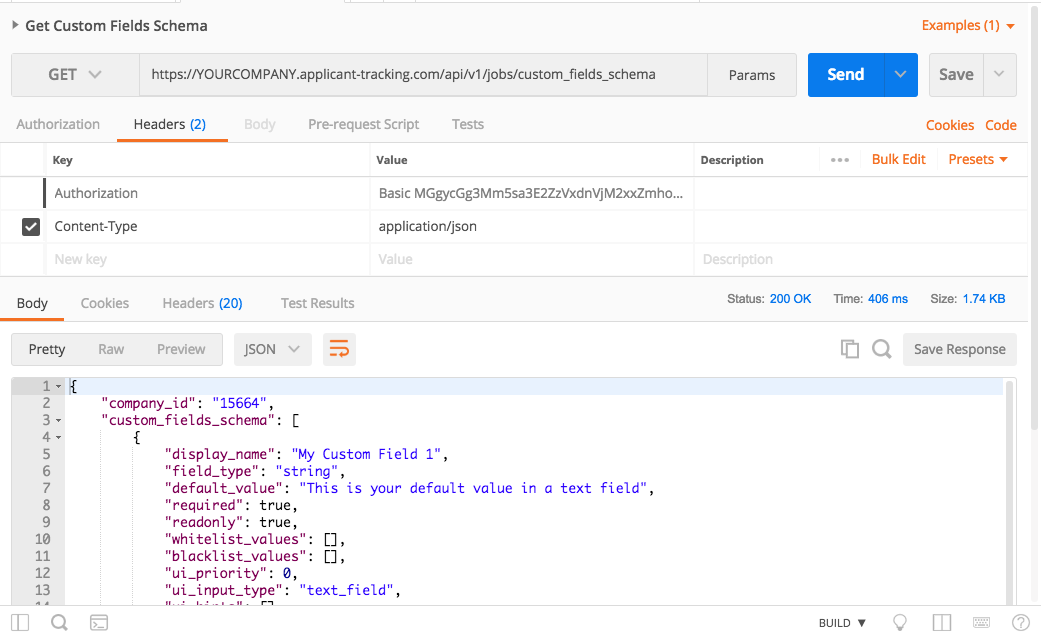
Make sure that you can query the API to retrieve all of your existing custom fields correctly. This can be done with the steps below,
- Use the
GETmethod with the request URL: https://api.applicant-tracking.com/api/v1/jobs/custom_fields_schema - Under Headers area put in the following column values:
Key: Content-type
Value: application/json - Ensure that your request is using Basic Authentication, using the API key/secret that can be found in the Account Details page.
Output
Here’s how it will look in Postman.
Step 3: Add/Modify The Custom Fields
WARNING: Updating Custom Fields will remove any data collected for that field. Please proceed with caution and reach out to support if you have any questions.
- Use the
PUTmethod with the request URL: https://api.applicant-tracking.com/api/v1/jobs/custom_fields_schema - Under Headers area put in the following column values:
Key: Content-type
Value: application/json - Ensure that your request is using Basic Authentication, using the API key/secret that can be found in the Account Details page.
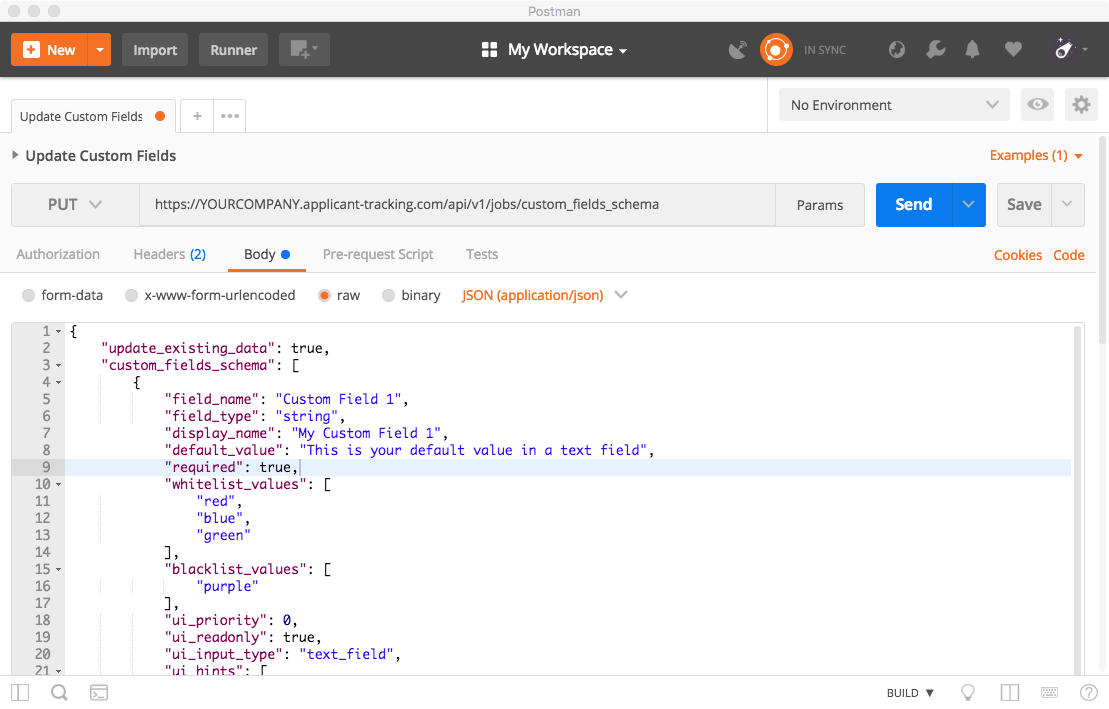
- Send over the raw request body shown in either the Postman example below, or in the cURL example below.
Option 1: Modify Fields with Postman
Option 2: Modify Fields with cURL
You can modify your custom fields schema using cURL as well, as shown in this example.
curl -u YOUR_KEY https://YOURCOMPANY.applicant-tracking.com/api/v1/jobs/custom_fields_schema -H "Content-Type: application/json" \
  -d '{
	"update_existing_data": true,
	"custom_fields_schema": [
		{
			"field_name": "custom_field_1",
			"field_type": "string",
      "display_name": "My Custom Field 1",
      "default_value": "This is your default value in a text field",
      "required": true,
      "whitelist_values": [],
      "blacklist_values": [],
      "ui_priority": 1,
      "ui_readonly": true,
      "ui_input_type": "text_field",
      "ui_hints": [],
      "ui_render_targets": ["view", "edit"]
    },
		{
    	"field_name": "custom_field_2",
      "field_type": "string",
      "display_name": "My Custom Field 2",
      "default_value": "This is your default value in a text area",
      "required": true,
      "whitelist_values": [],
      "blacklist_values": [],
      "ui_priority": 2,
      "ui_readonly": false,
      "ui_input_type": "text_area",
      "ui_hints": [],
      "ui_render_targets": ["view", "edit"]
    },
    {
			"field_name": "custom_field_3",
			"field_type": "string",
      "display_name": "My Custom Field 3",
      "default_value": "This is your default value",
      "required": true,
      "whitelist_values": [
      	"red"
      ],
      "blacklist_values": [],
      "ui_priority": 3,
      "ui_readonly": false,
      "ui_input_type": "select",
      "ui_hints": [
      	"red"
      ]
	  }
  ]
}
Note that a timestamp will be generated at the end.
Output
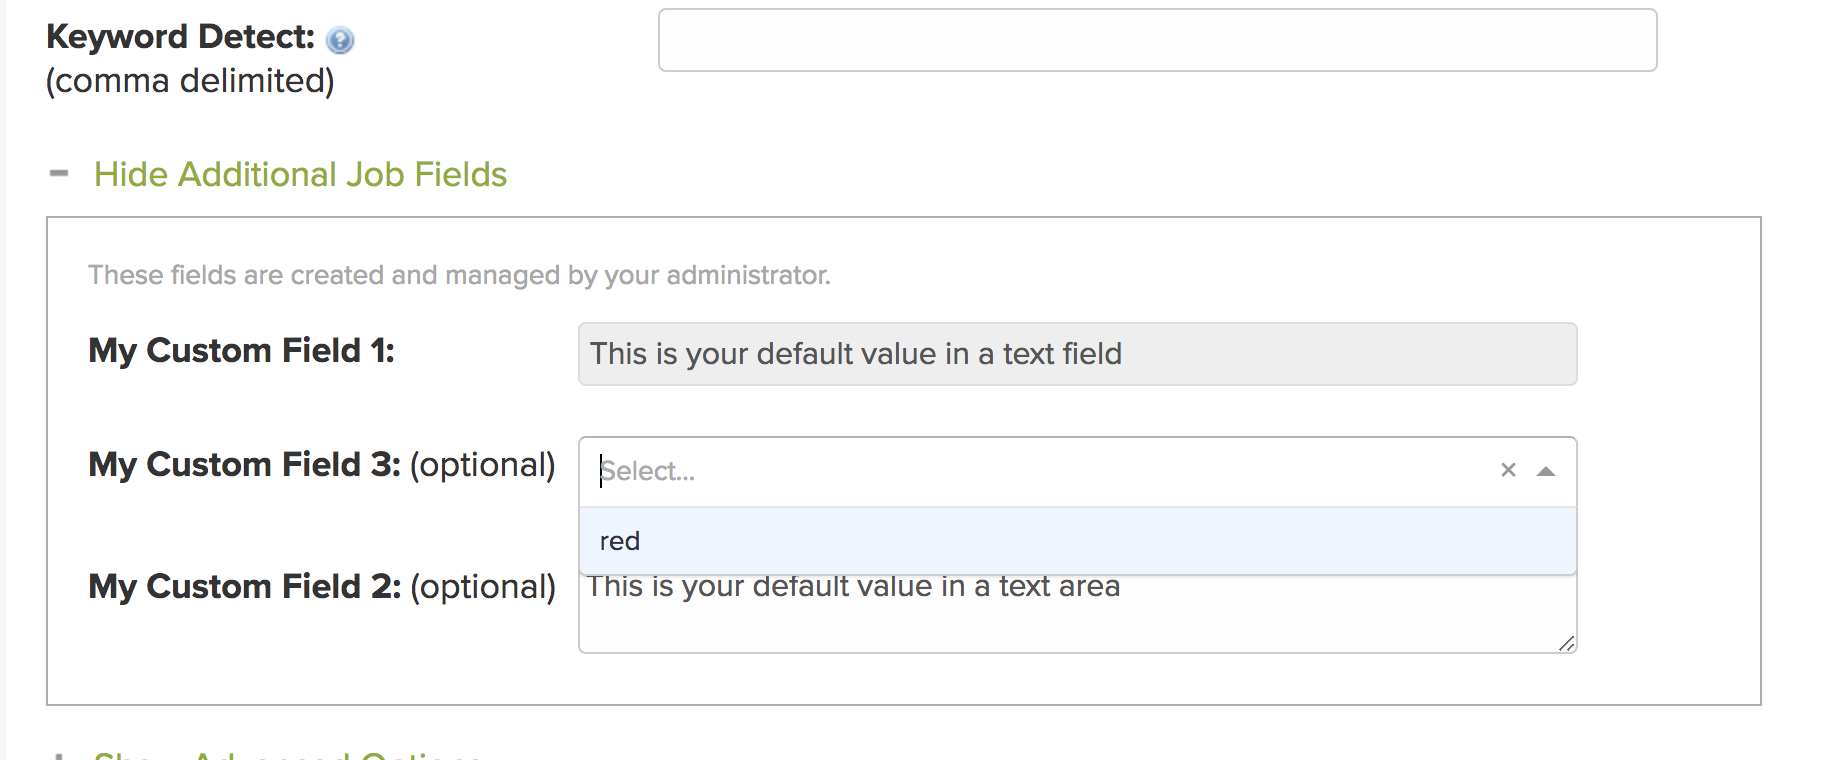
You will likely have more creative field names than our example below, as well as more than one option in a select list, but this just shows what is possible from the the custom field endpoint.
Once again here’s how it will appear on your site:
Step 4 (Optional): Confirm New Custom Fields via the API
Once you've added these fields, you can retrieve them via the API using the same request that was used in Step 2 to query the existing custom field records.
Support
Need Help?Contact our support team for more information about using custom fields schema.
Updated 9 months ago
